How to Integrate Auto Ads of Adsense on Jekyll
In this guide, we’ll walk through the steps to add auto ads from Adsense to your website.
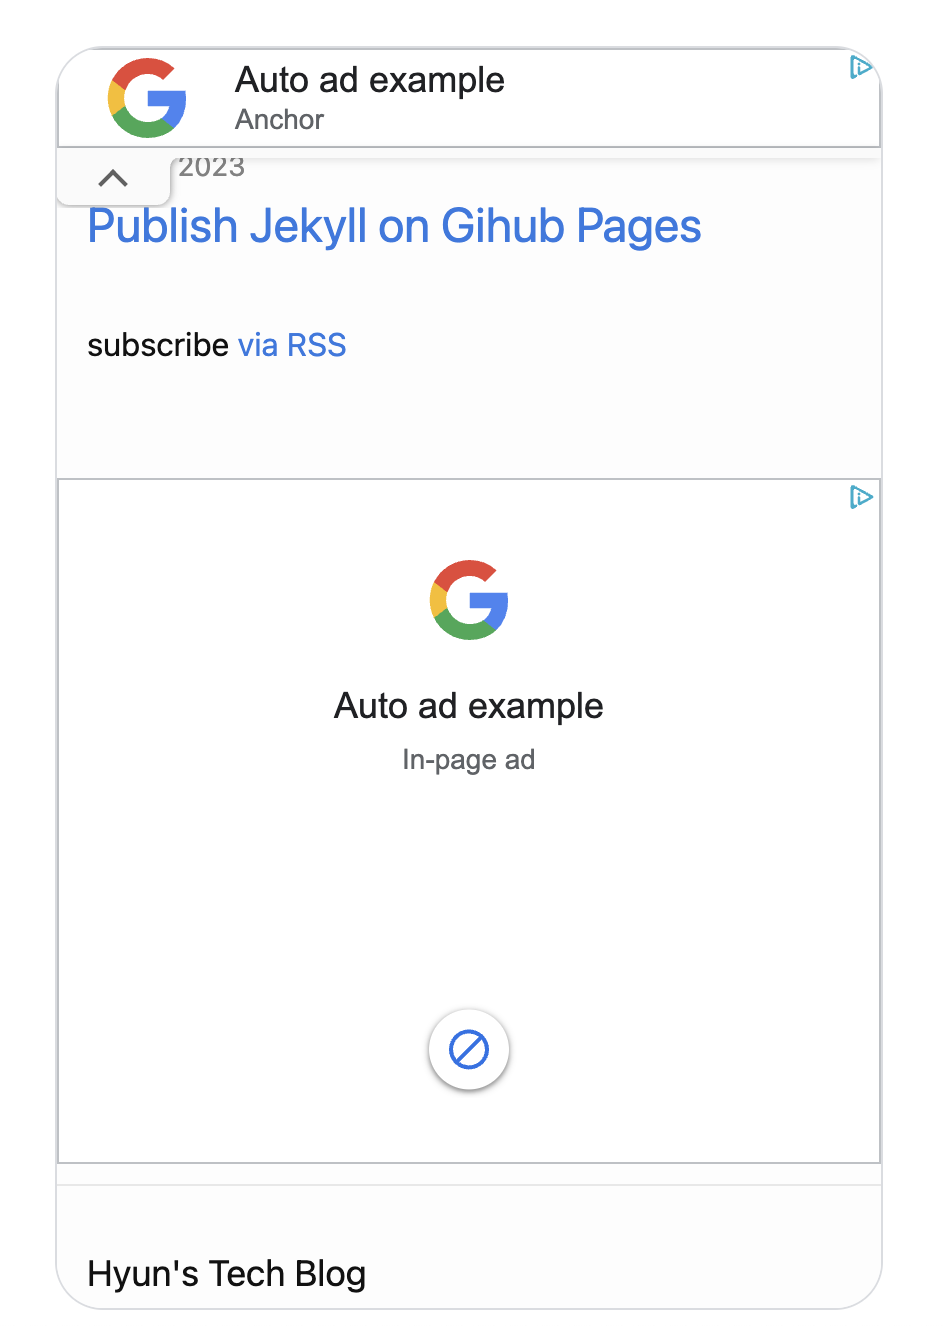
With Auto ads, the integration of Adsense becomes a breeze. There’s no need to manually add ads to each page. Instead, Adsense automatically places ads in optimal locations across your site. This not only saves time but also enhances the user experience by ensuring that ads are strategically positioned.
Step 1: Create a New Site
First, you’ll need to create a new site on Adsense.
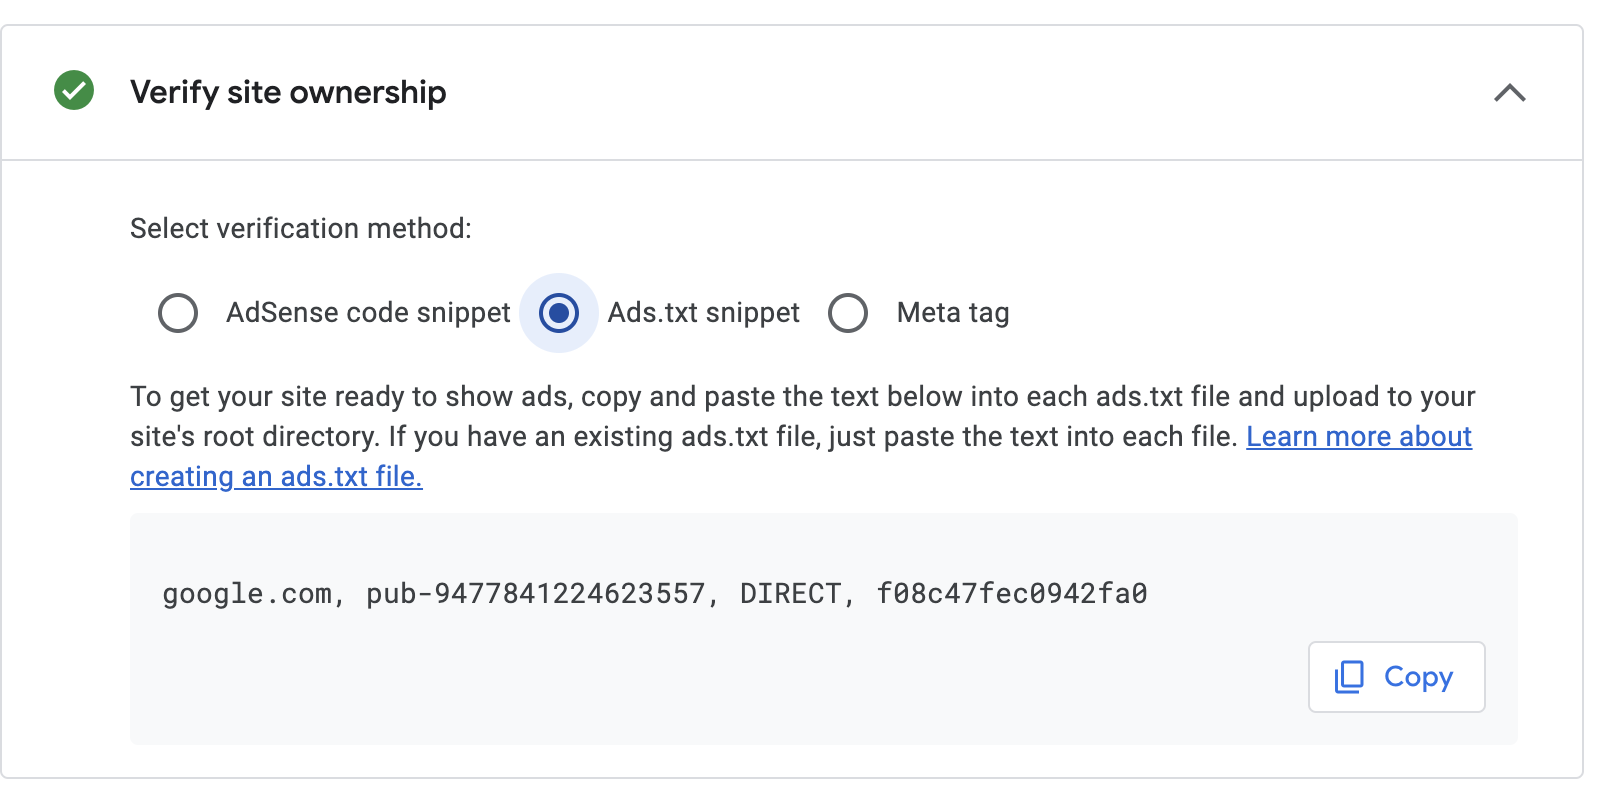
After creating the site, copy the text from ads.txt and create a file named ads.txt at the root path of your Jekyll project. Once you’ve deployed it on the server, verify it.
Step 2: Add Auto Ads
Next, navigate to the Ads page and click the edit button.

On this page, you can select the ads you want to display on your website.
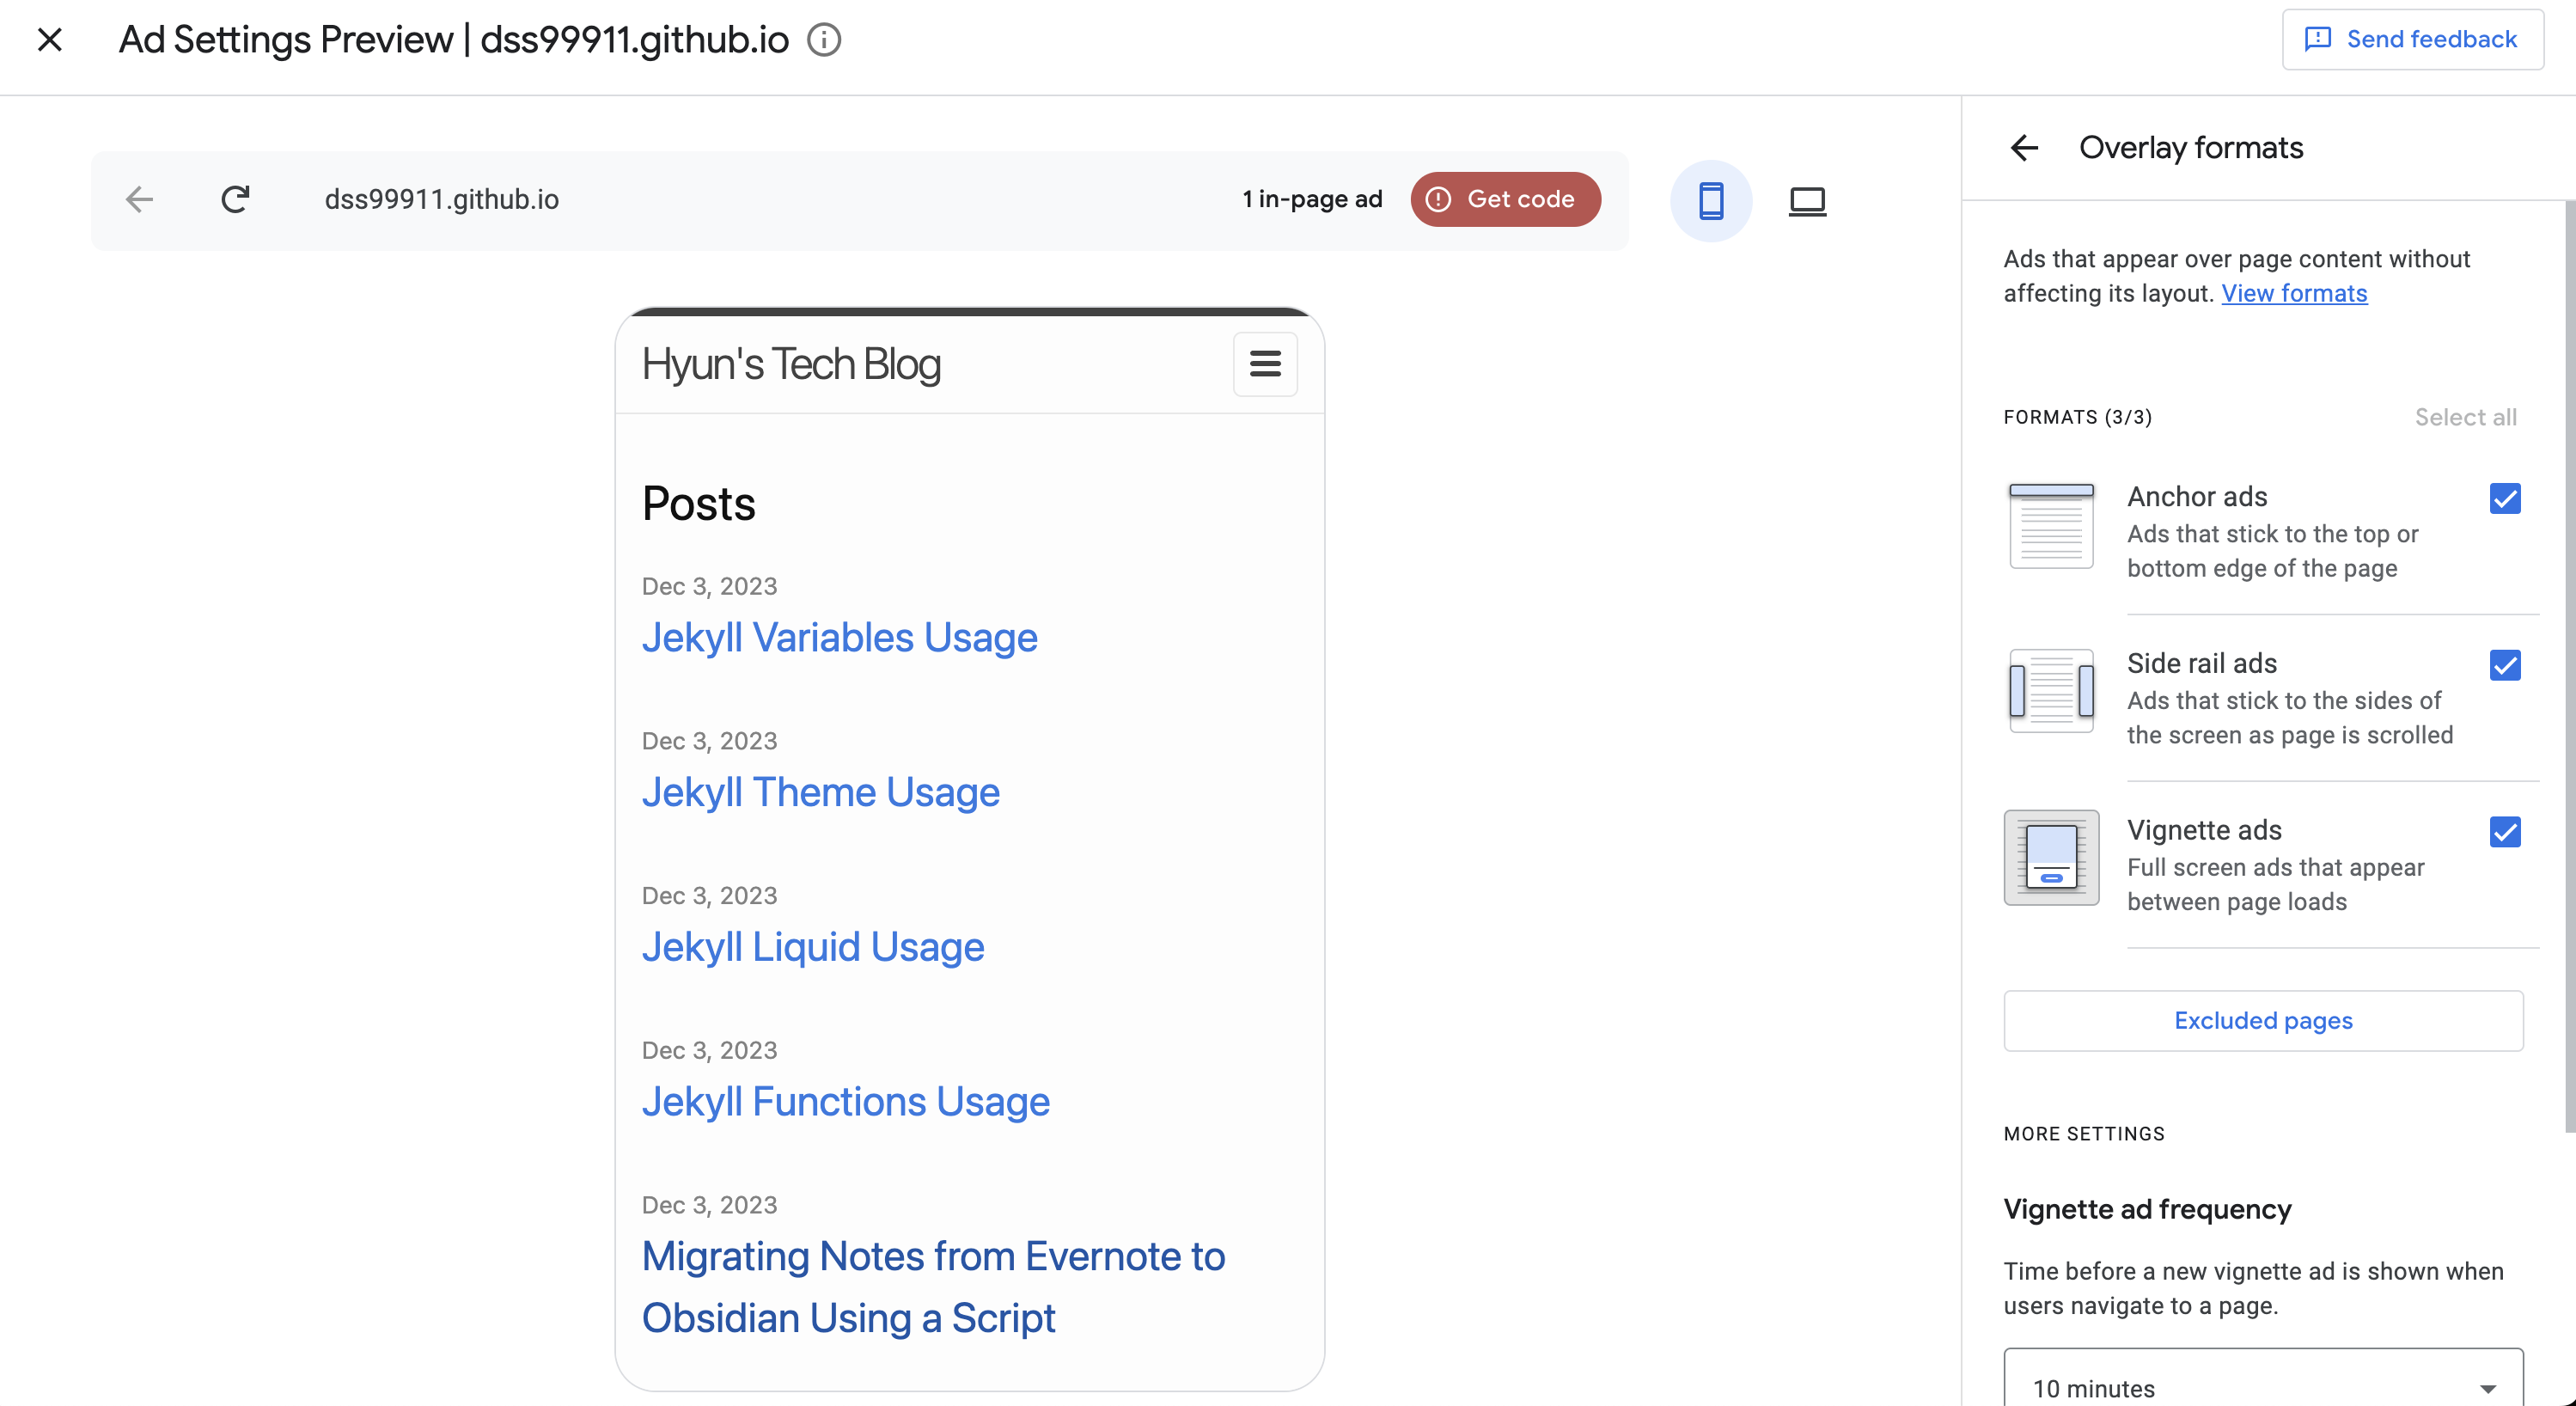
After selecting your ads, click the red ‘Get code’ button.
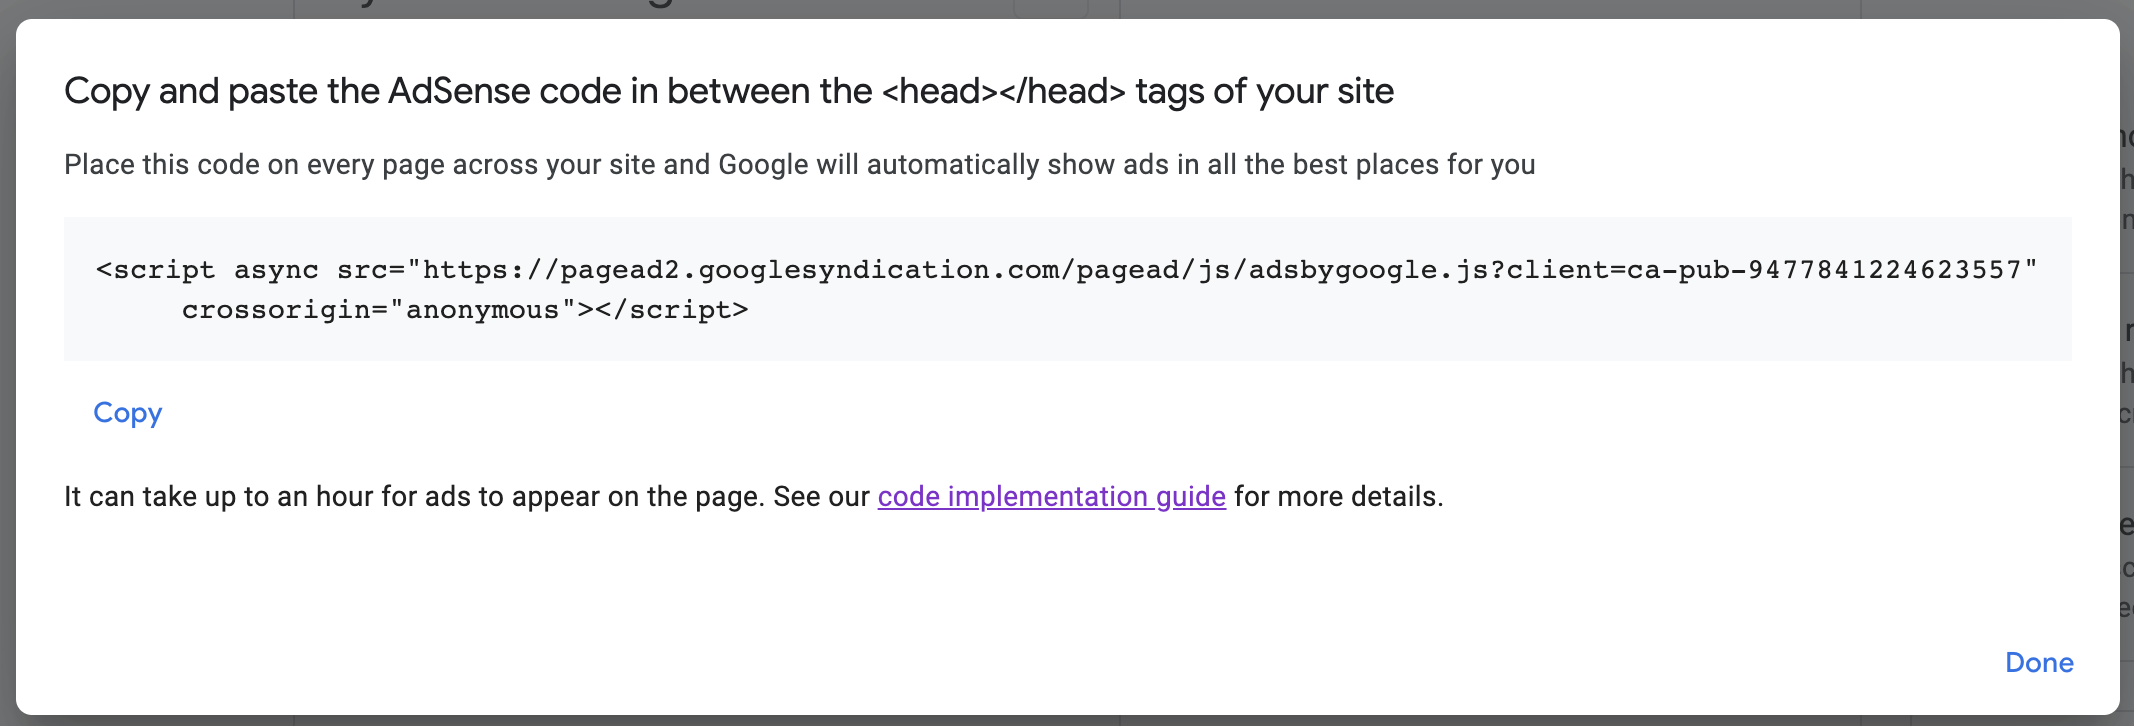
Copy the script and add it to _includes/head.html since head.html`` is included on all pages. This will ensure that your ads are displayed across your entire site.
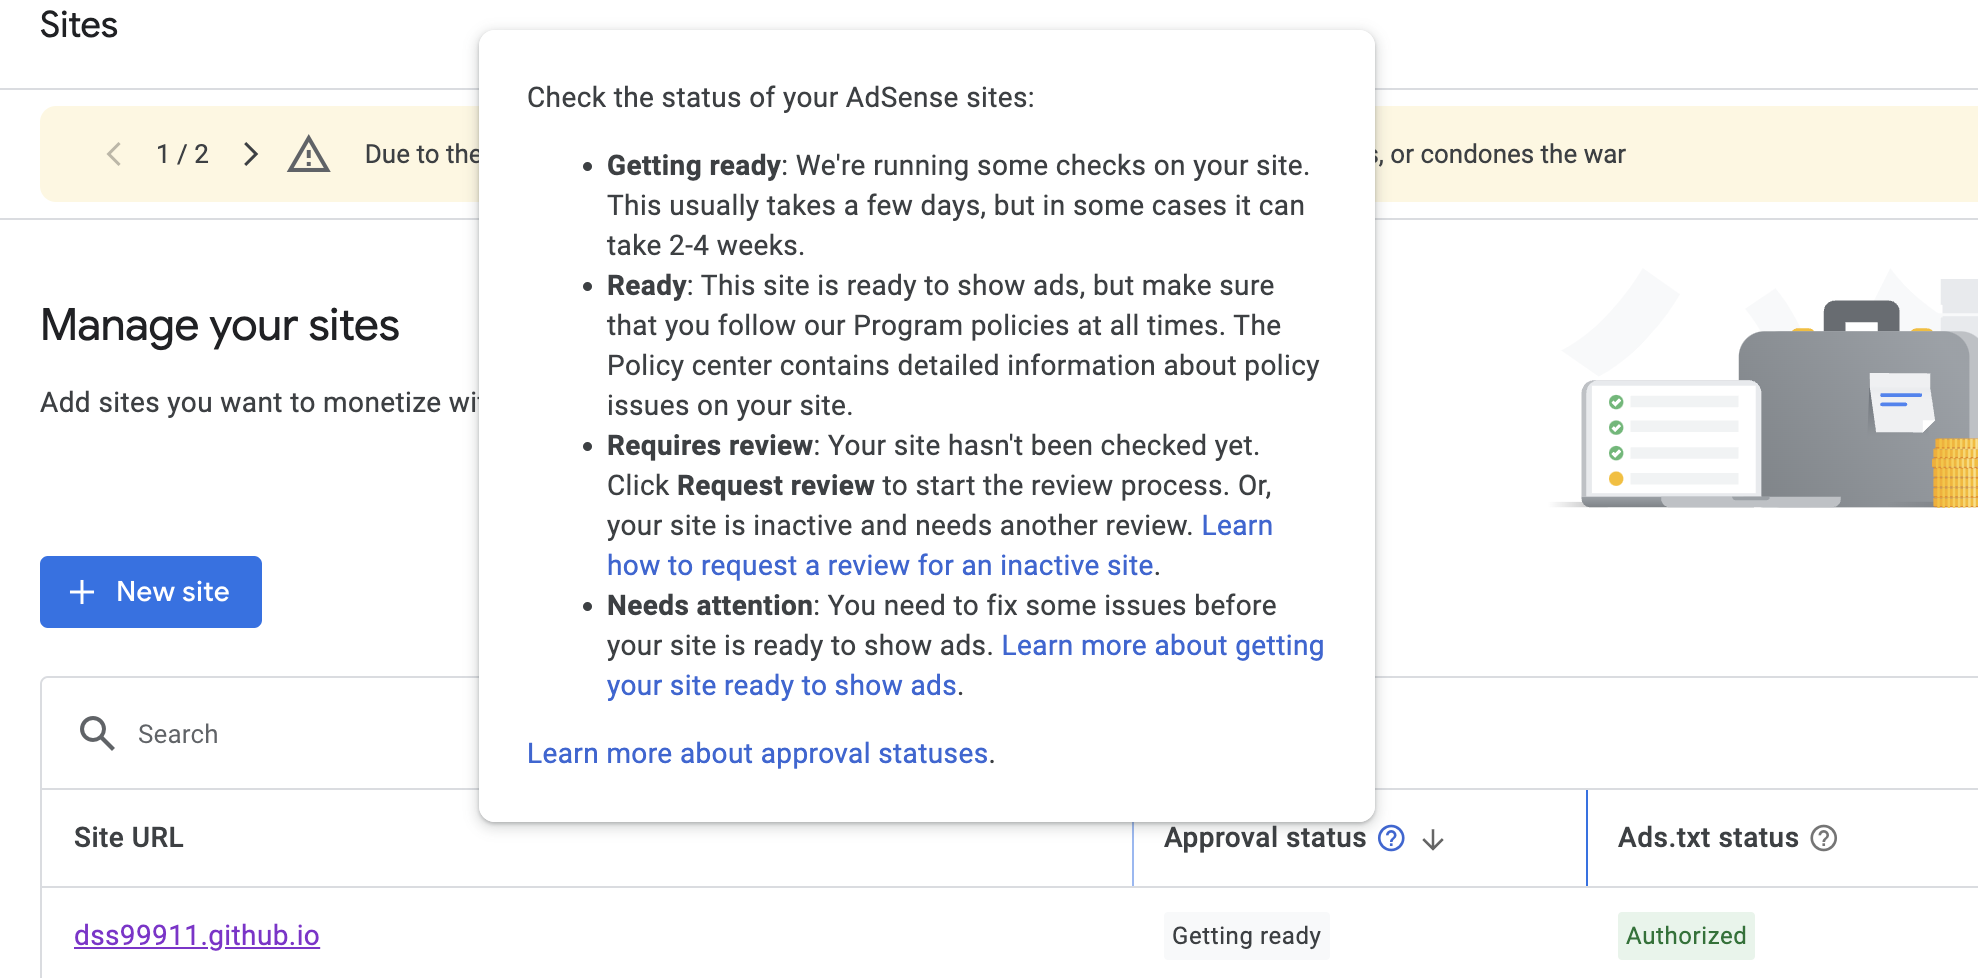 If the status of Ads.txt is
 Authorized and the Approval status is Getting Ready, then you’ve done a great job. Now, all you need to do is wait for AdSense’s review to be completed. This process can take anywhere from a few days to a few weeks. So, sit back and relax while AdSense does its work.
And that’s it! You’ve successfully added auto ads from Adsense to your website. Happy monetizing!